Morphing audio files in Altered Studio is the process of using Speech-to-Speech synthesis to change your input voice into a new ‘target’ voice.
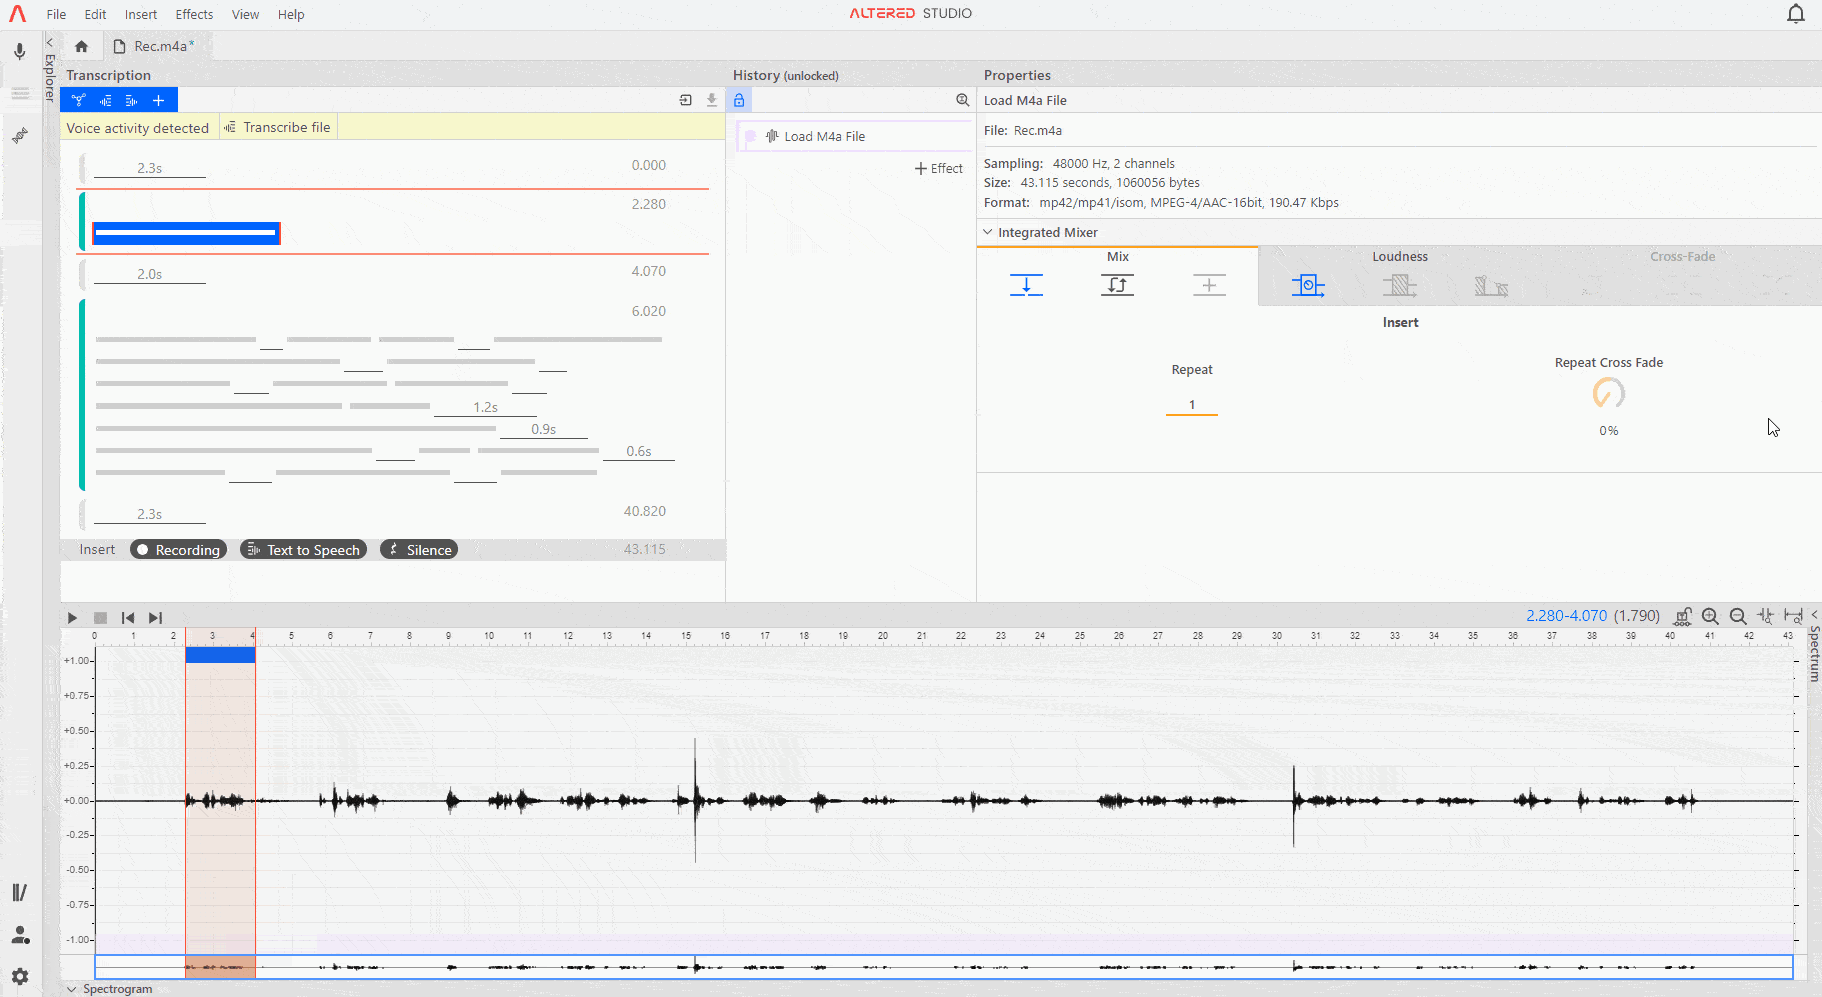
You can morph the whole file, a single block, or a selection from the waveform.
Before you can morph audio on the desktop version you may need to install your desired voices from the Voice Library (refer to Using the Voice Library).
Always start with clean, raw audio, without any effects or filters applied. The speaker should be close to the microphone and background noise or room reverb should be avoided as these can interfere with the synthesis quality. Refer to Tips for Best Recording Performance for further guidance.
If you want to morph different sections of audio file into different voices (e.g. for different speakers in a conversation etc), then you should add a new Morph effect layer for each section / character. Each Morph effect layer only synthesises the audio from the section of audio that the Morph effect was applied to, so if you want to morph a different part of the file then you should create a new Morph effect for that section.
By using the block controls in the transcript panel, you can easily add Morph effects to different parts of your file to create a conversation between a multi-cast of characters (refer to Working with the Transcription Panel for information on how to morph a block).
You can also select your desired section of the waveform and use + Effect to add a new Morph effect. If no selection is made, then the Morph effect will be applied to the whole file.
Once the Morph effect layer has been created, use the (+) button the Morph Properties panel to open the Voices selection screen. From here choose one or more Voices which you would like to use and click OK.
Each Voice has a number of options as outlined below, take care to set these before proceeding. Refer to Working with Presets for instructions on how to save Voice configuration settings for future use.
Once you have chosen your Voice, move onto the voice model selection and voice settings.
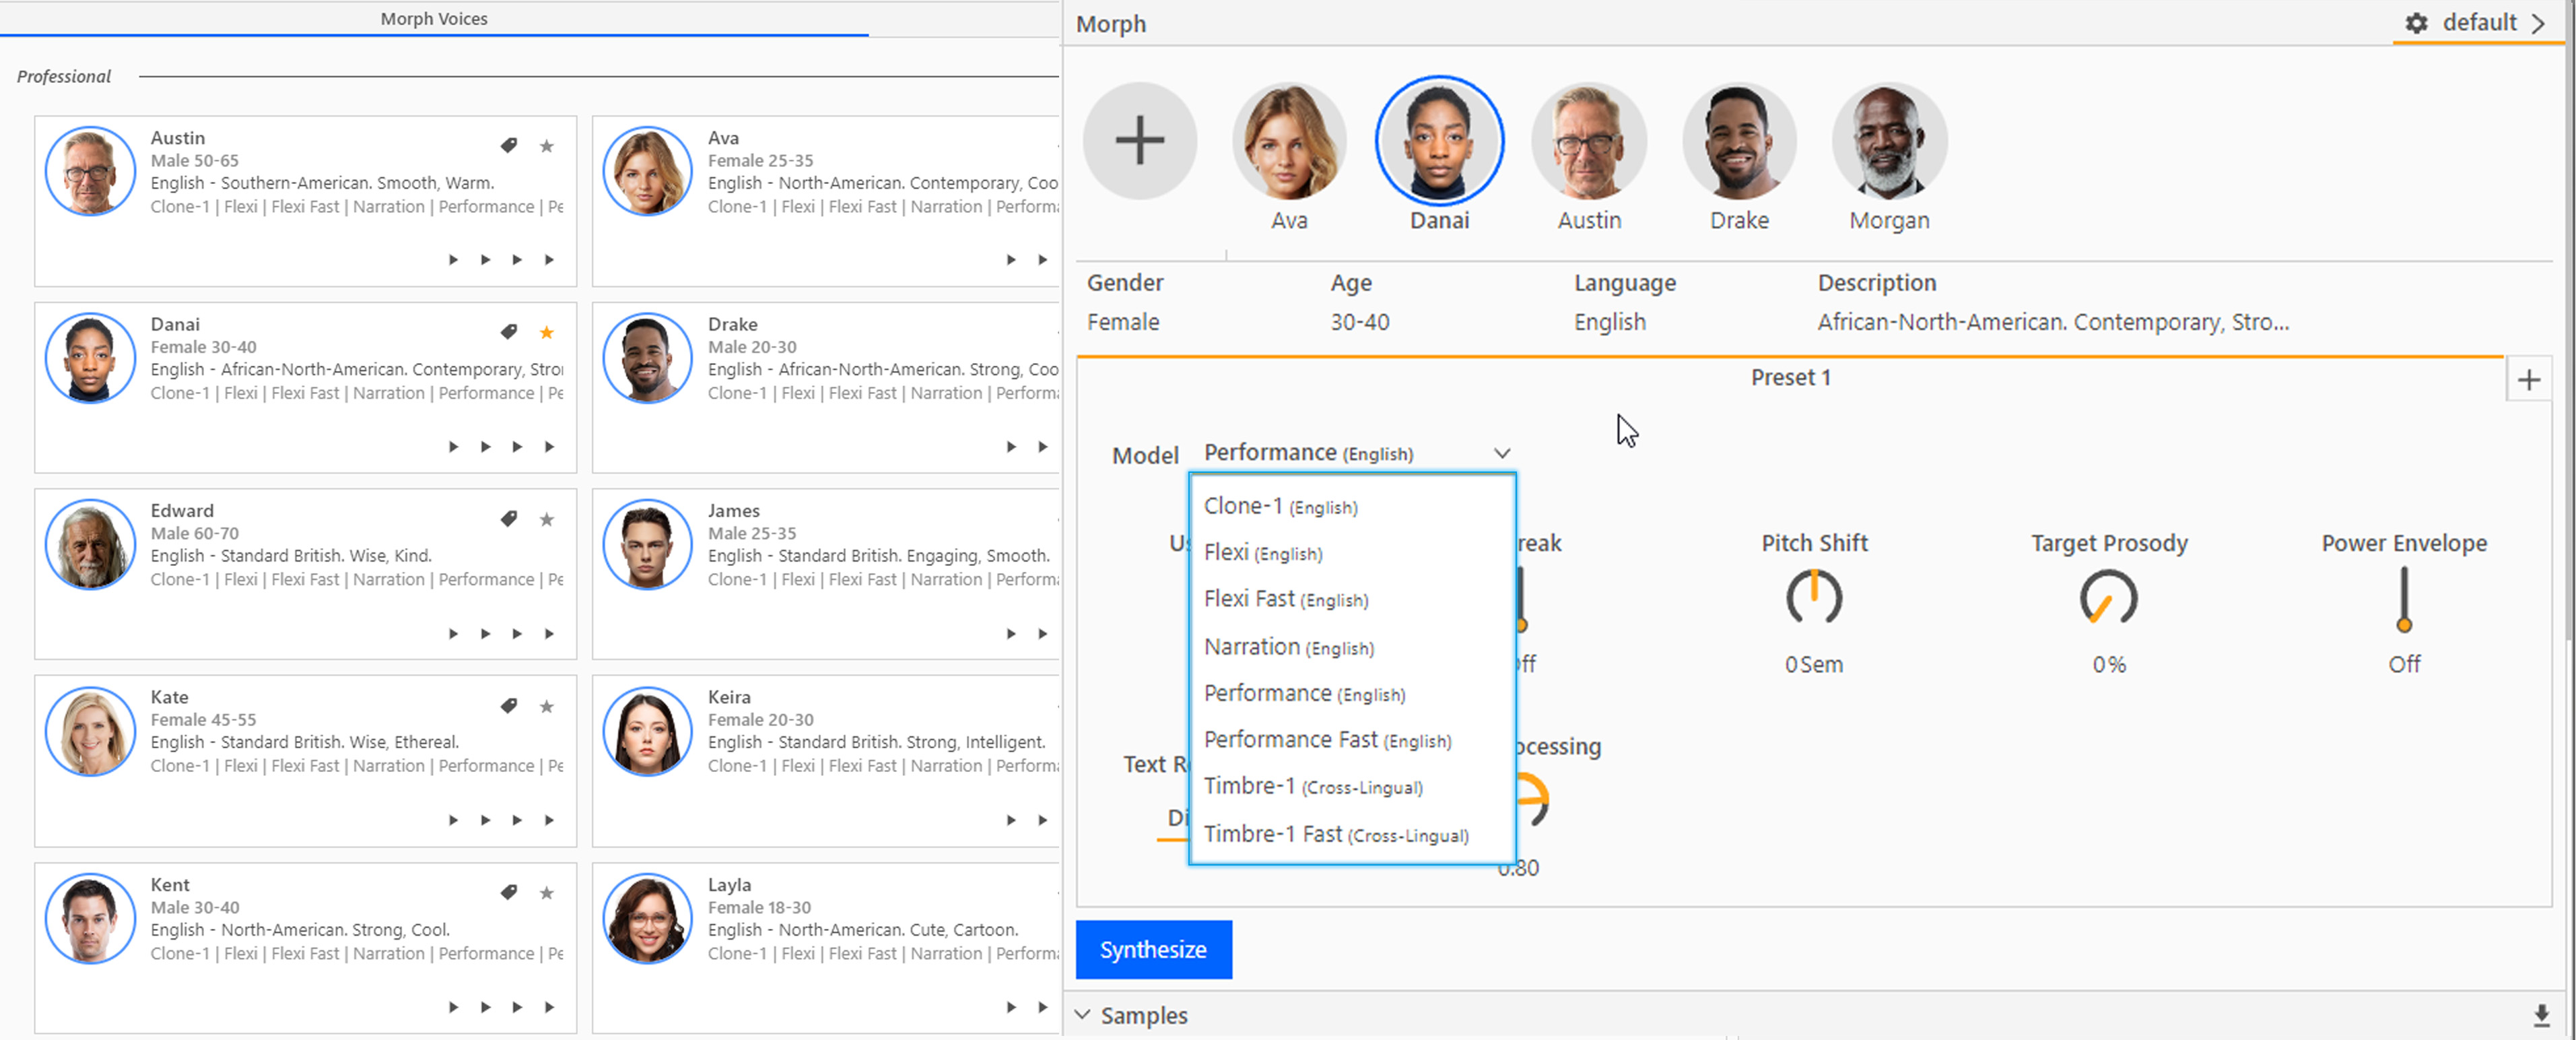
The Model dropdown allows you to choose between the different models available for each Voice. These will vary depending on your subscription level and you may not have access to all types. Different models are designed for different use cases (see below).
Timbre (cross-lingual) models are designed for non-English inputs. These models are the only ones which don’t convert accents and are best suited to preserve characteristics of the accent, sounds and emotes from your input performance. Age, Gender and Loudness shifts are now available in Timbre.
Performance (English) models allow a closer reproduction of your input performance and dynamics, with the additional Prosody setting for greater performance range.
Flexi (English) models have additional settings such as Age, Gender and Loudness shifts to provide more variety and range.
Clone (English) models are designed to sound more like the target voice than the Performance voices do, and are less influenced by the input speaker than the other voices.
Narration (English) models have greater constraint over dynamics and performance characteristics, to give a more typically narrative feel.
In addition, each model type has a “Fast” version which provides quicker, but lower fidelity synthesis, which can be useful for rapid prototyping.
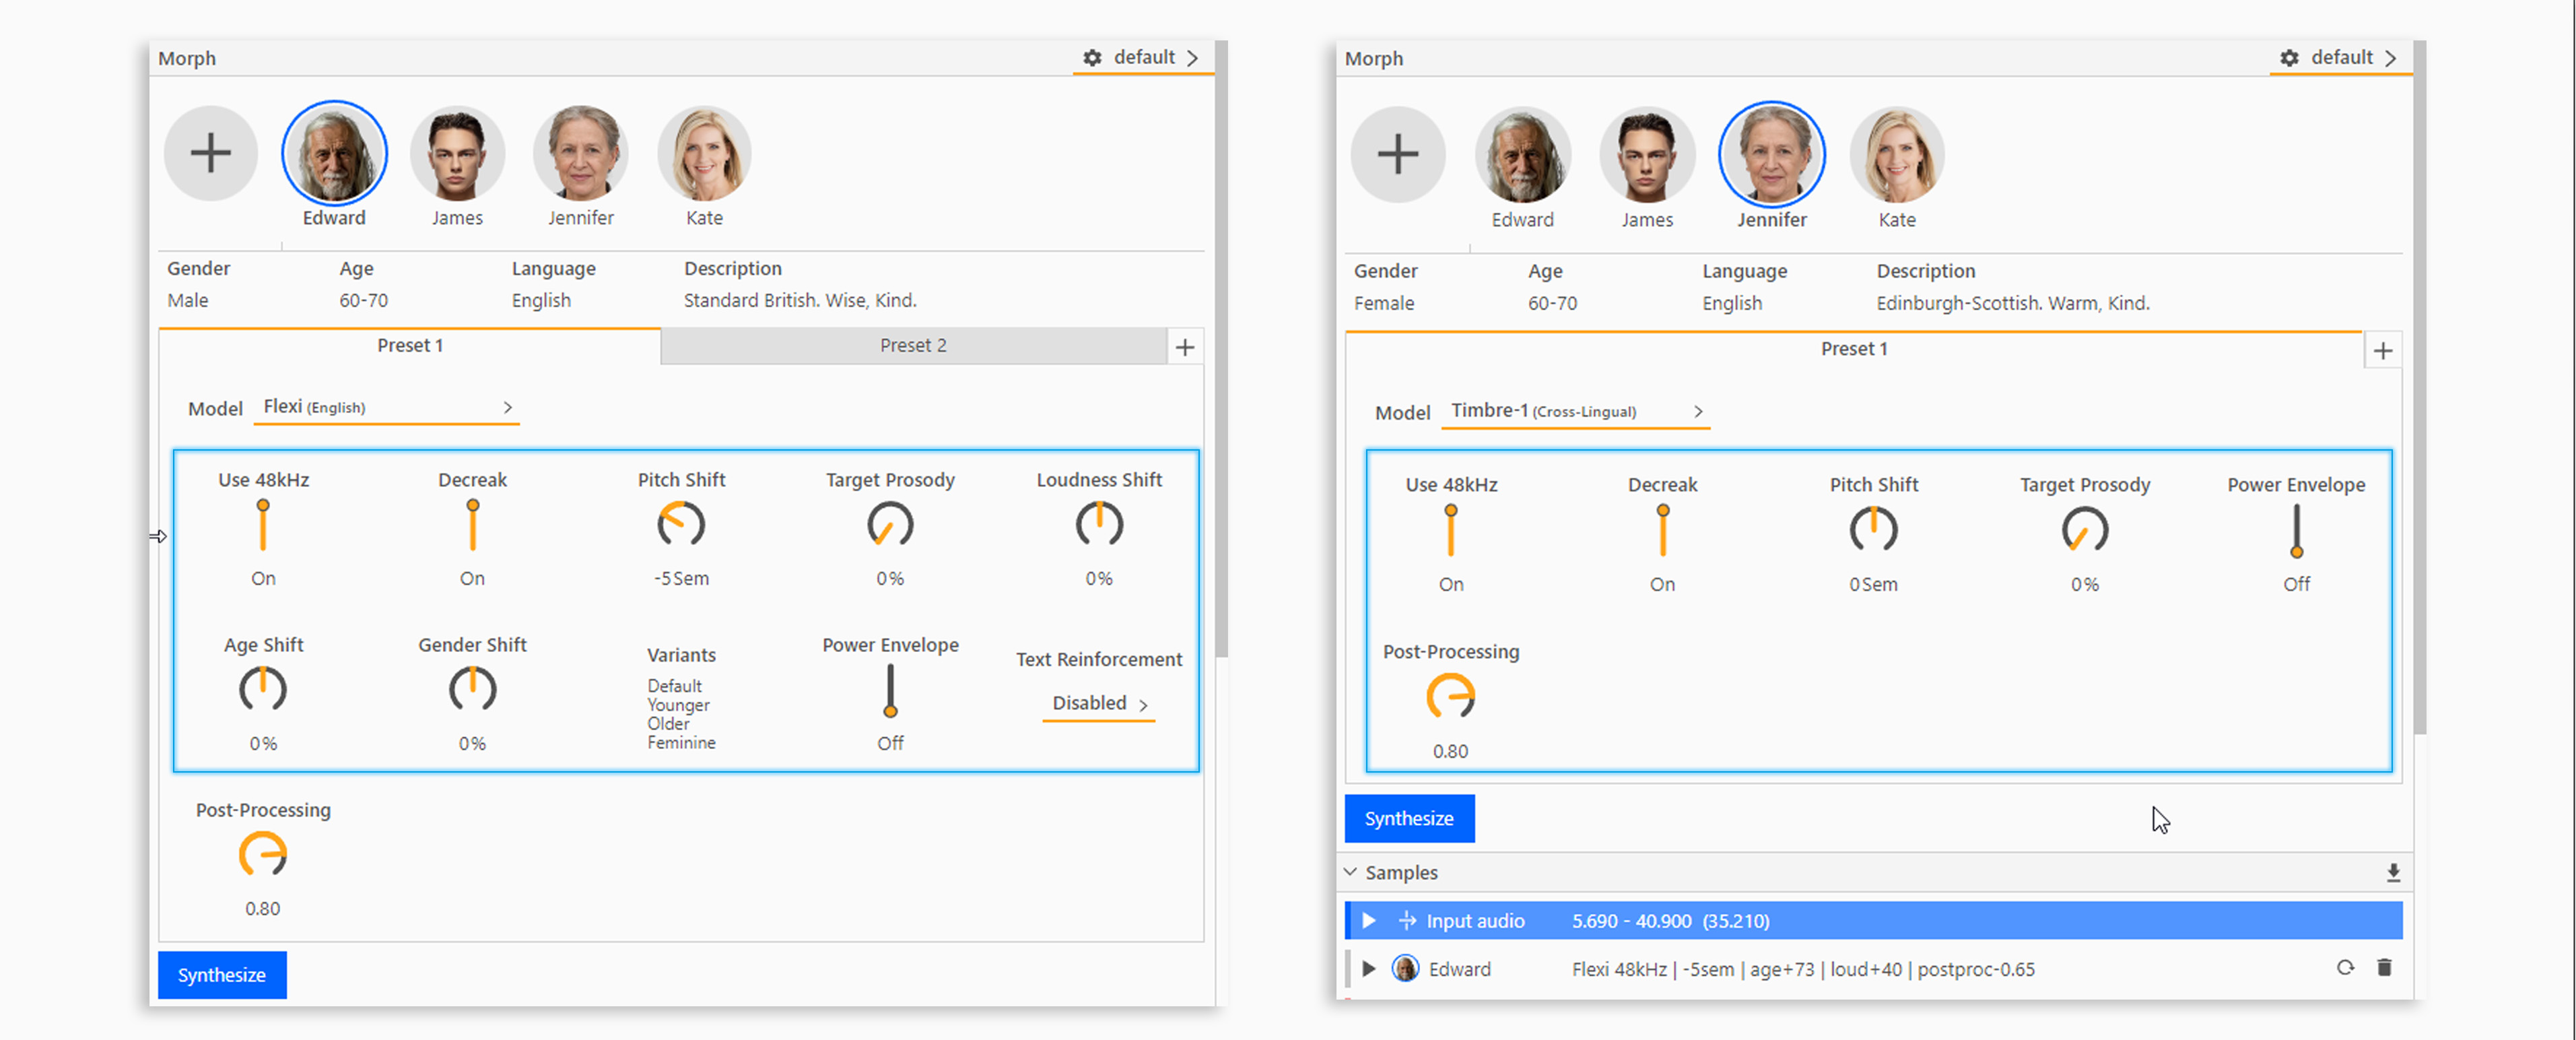
The Morph panel contains several other settings that will change the morph output. The settings available may change depending on which model is used.
Use 48kHz generates the output of the synthesis at 48kHz, if this is not selected then the output will be generated at 24kHz by default.
Decreak corrects minor vocal fry/creak in the source file, to provide a clearer synthesis output. Turn this setting off if you prefer these sounds to come across in the performance from the source audio.
Pitch Shift is used to change the pitch of the morphed sample from the target voice’s natural pitch. The best results come from using a range of +/- 2 semitones, however the setting allows for a wider range if you wish to experiment. This setting can improve the synthesis where there is a large difference in pitch between the input and target voices so it is worth trying different settings to get the best output.
Target Prosody is used to adjust the weighting between the input voice and the target voice’s natural performance characteristics. A higher Prosody (closer to 100%) will reduce the likeness to the input performance and take more performance from the target voice model.
Text Reinforcement is available on certain subscription levels for some models. It can be used to correct minor mispronunciations on the morph output by forcing the spoken words to match the transcript. If the transcript is wrong you should edit the text before you add a morph effect in order for the Text Reinforcement functionality to be available.
Loudness Shift changes the output between whispering (dial to the left) and loud speaking (dial to the right).
Age Shift changes the output between younger sounding (dial to the left) and older sounding (dial to the right).
Gender Shift changes the output between highlighting more masculine qualities (dial to the left) or more feminine qualities (dial to the right) in the voice.
Power Envelope can be used to smooth out dynamic changes in longer morphs. If you find the synthesis is performing inconsistently across the file, then turning this ON can help to improve your morph outputs.
Post-Processing sharpens the sound and reduces artefacts and noise in the synthesis. By default this is set to 80% however higher or lower settings may be appropriate for your audio. This setting is not available on the Fast models due to the nature of the synthesis process.
Once you have finalised your settings click Synthesize to create a Morph sample.
The Speech-to-Speech synthesis is non-deterministic, so there may be slight differences in read, emphasis etc. between outputs generated with the same settings. For this reason we recommend generating a few samples so you can choose your preferred one. NB this principle does not apply to the Fast models which are deterministic and will give consistent synthesis outputs each time.
Click on your chosen sample to select it as active on the waveform, you can listen to the input audio for a Morph effect at any time by pressing ▶ on the Input Audio row in the sample bay.
The Mixing panel will show options for mixing, loudness and crossfade for the morphed audio with the rest of the waveform. Refer to Adding Audio Effects for more information on using these effects.
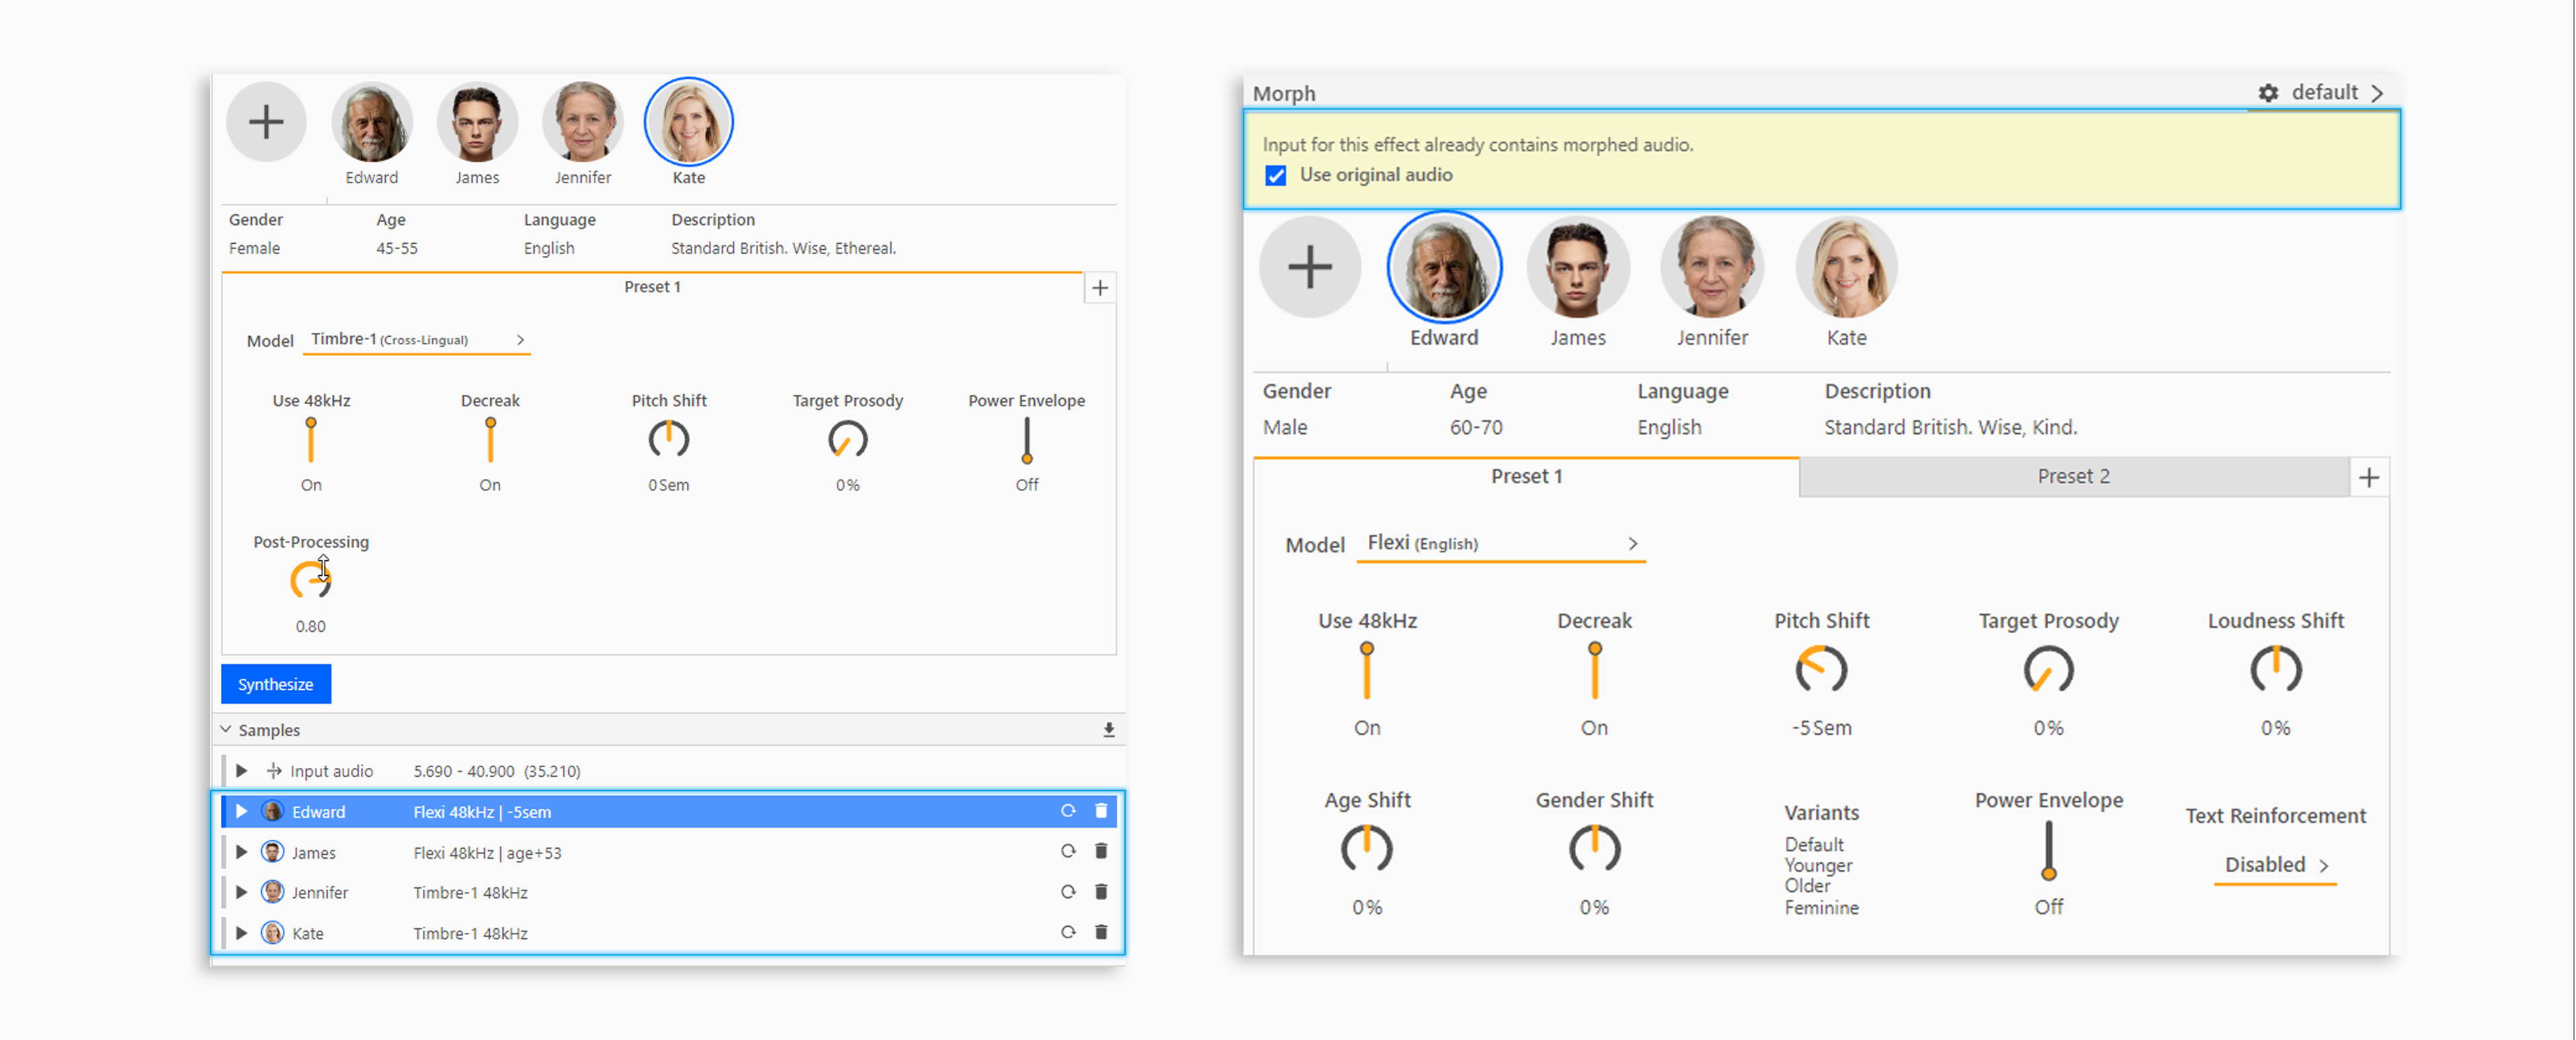
Once a morph sample is selected, subsequent edits and effects applied to this section of the waveform will be based on the morphed audio.
If you add a morph effect which overlaps a previous morph effect layer in the History then you will see a yellow area above the voice selection panel which says “Input for this effect already contains morphed audio”. This indicates the overlap exists, check “Use original audio” to avoid morphing the original morph again, which may decrease quality.
Using the blocks in the Transcription Editor is a simple way to avoid any overlapping sections.
When generating synthesis you can add as many morphs as you want, and you do not need to wait for each to finish before starting the next. As noted above, some models will give slight variations in read and performance, so it is often beneficial to click the Synthesise button multiple times and quickly add additional samples for processing to find your favourite output.
Refer to Morph Quota Guidance for more information on how quota is consumed during synthesis.
You can export an individual morph sample to disk by right-clicking and choosing Export as. Alternatively, you can export all the files in the sample bay at once by using the ⬇ download icon in the top right corner of the Sample panel.
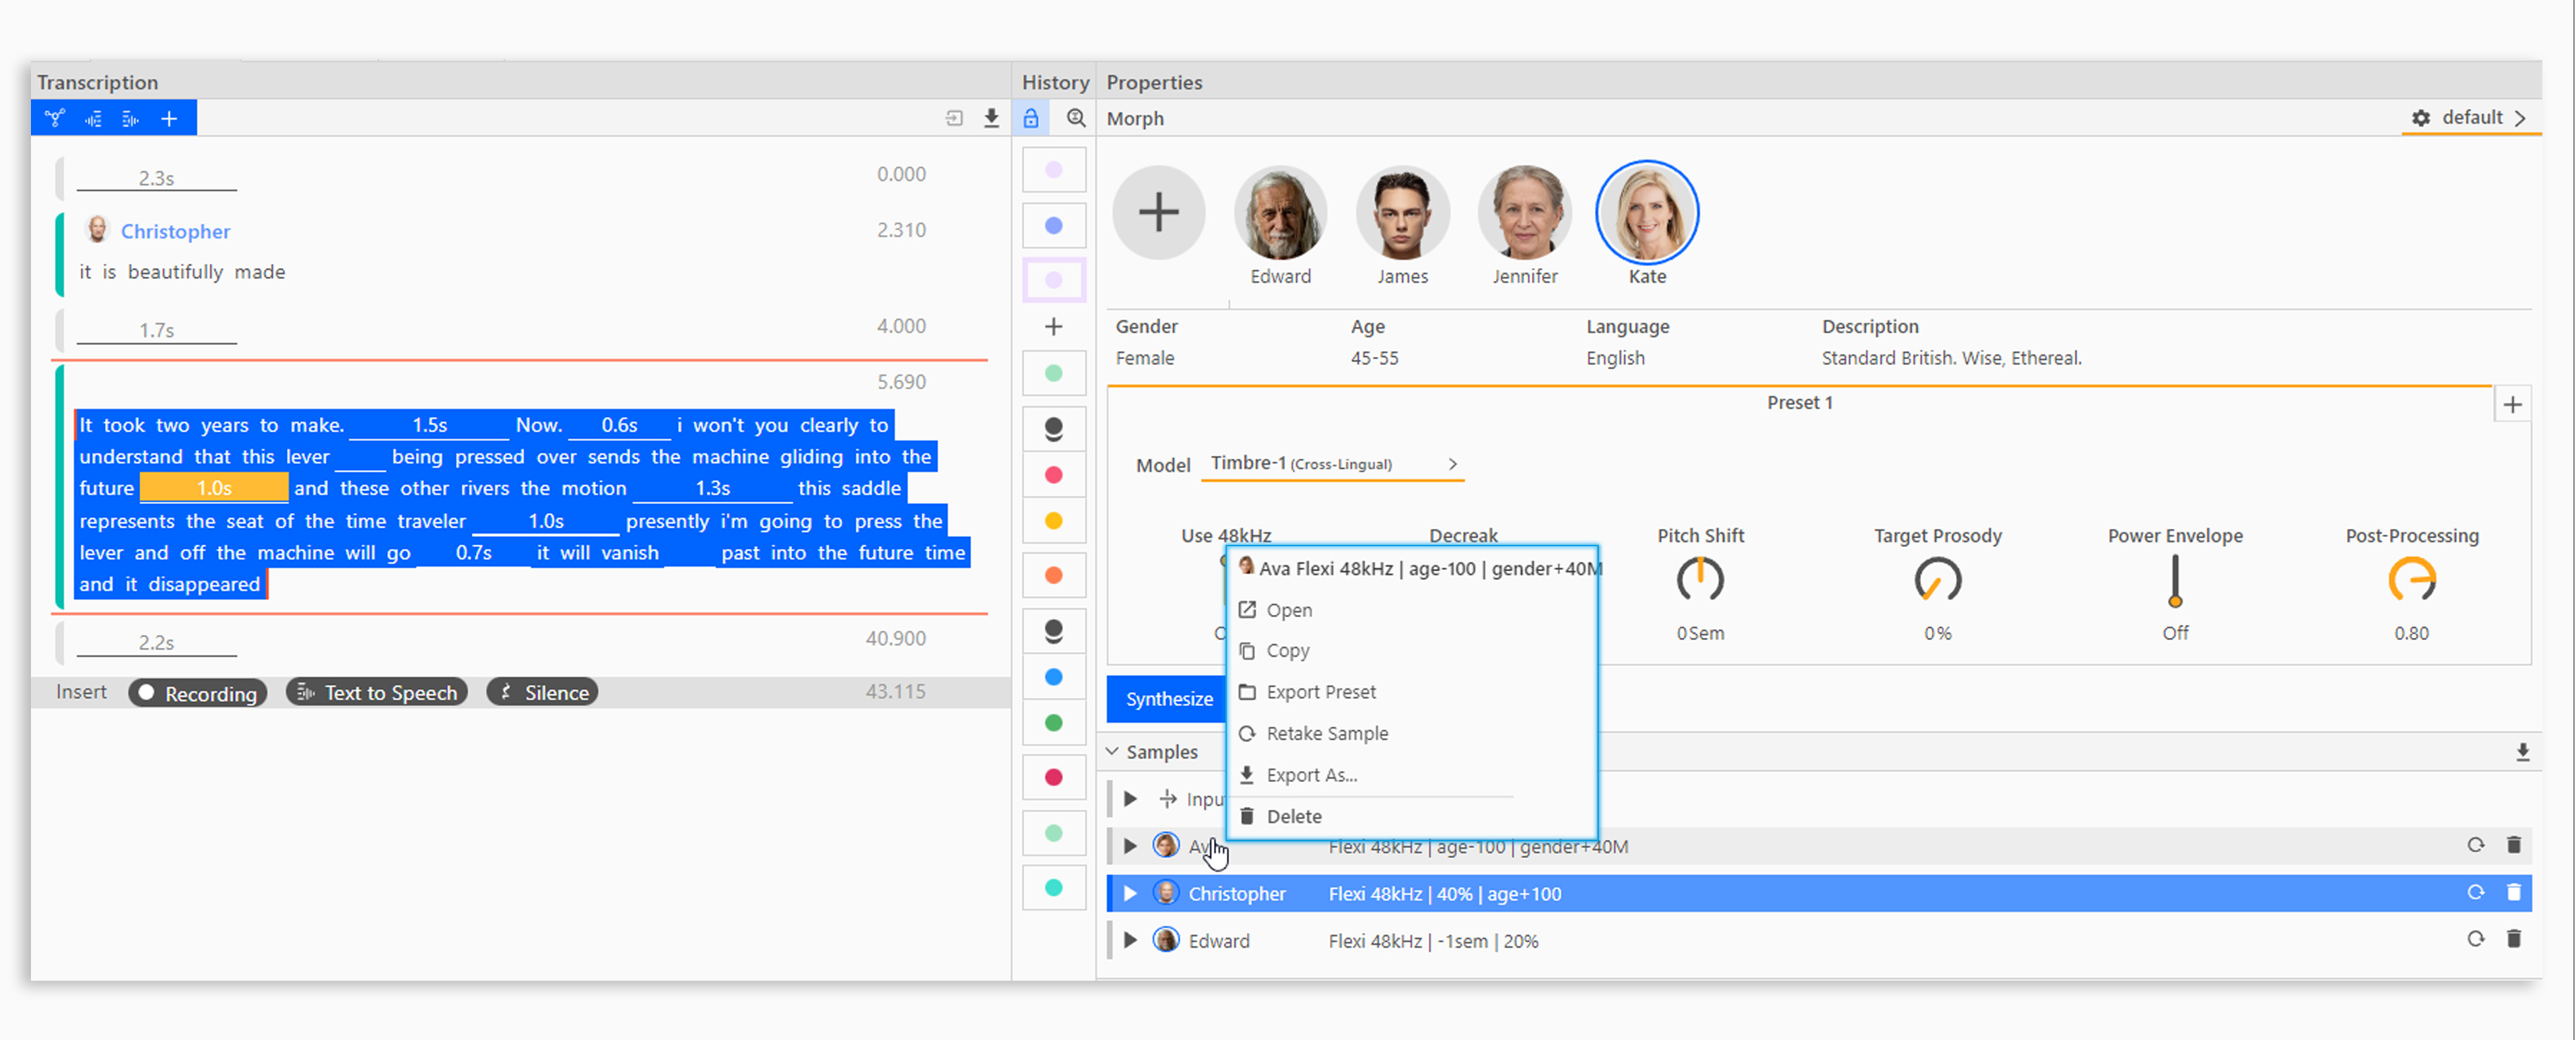
By right-clicking on a morph sample you can perform the following functions.
Open the sample as a new tab to edit it separately.
Copy the sample to the Clipboard for future use in the same session (refer to Working with the Clipboard).
Export Preset will create a new preset with the settings used to create this morph sample.
Retake Sample will create a new sample with the same settings.
Export as… lets you export an audio file of the sample to disk.
Delete will delete the sample
