Batch Mode is available in the Local version and allows you to perform synthesis and apply effects in bulk. For example you can use this to morph files into multiple voices, or to process large amounts of TTS.
For each batch mode, you must select the Workspace Folder which you want the batch files to be saved to before you can start processing.
There are three available batch modes (Simplified Morphing, Audio Input and Text Input) which are detailed below:
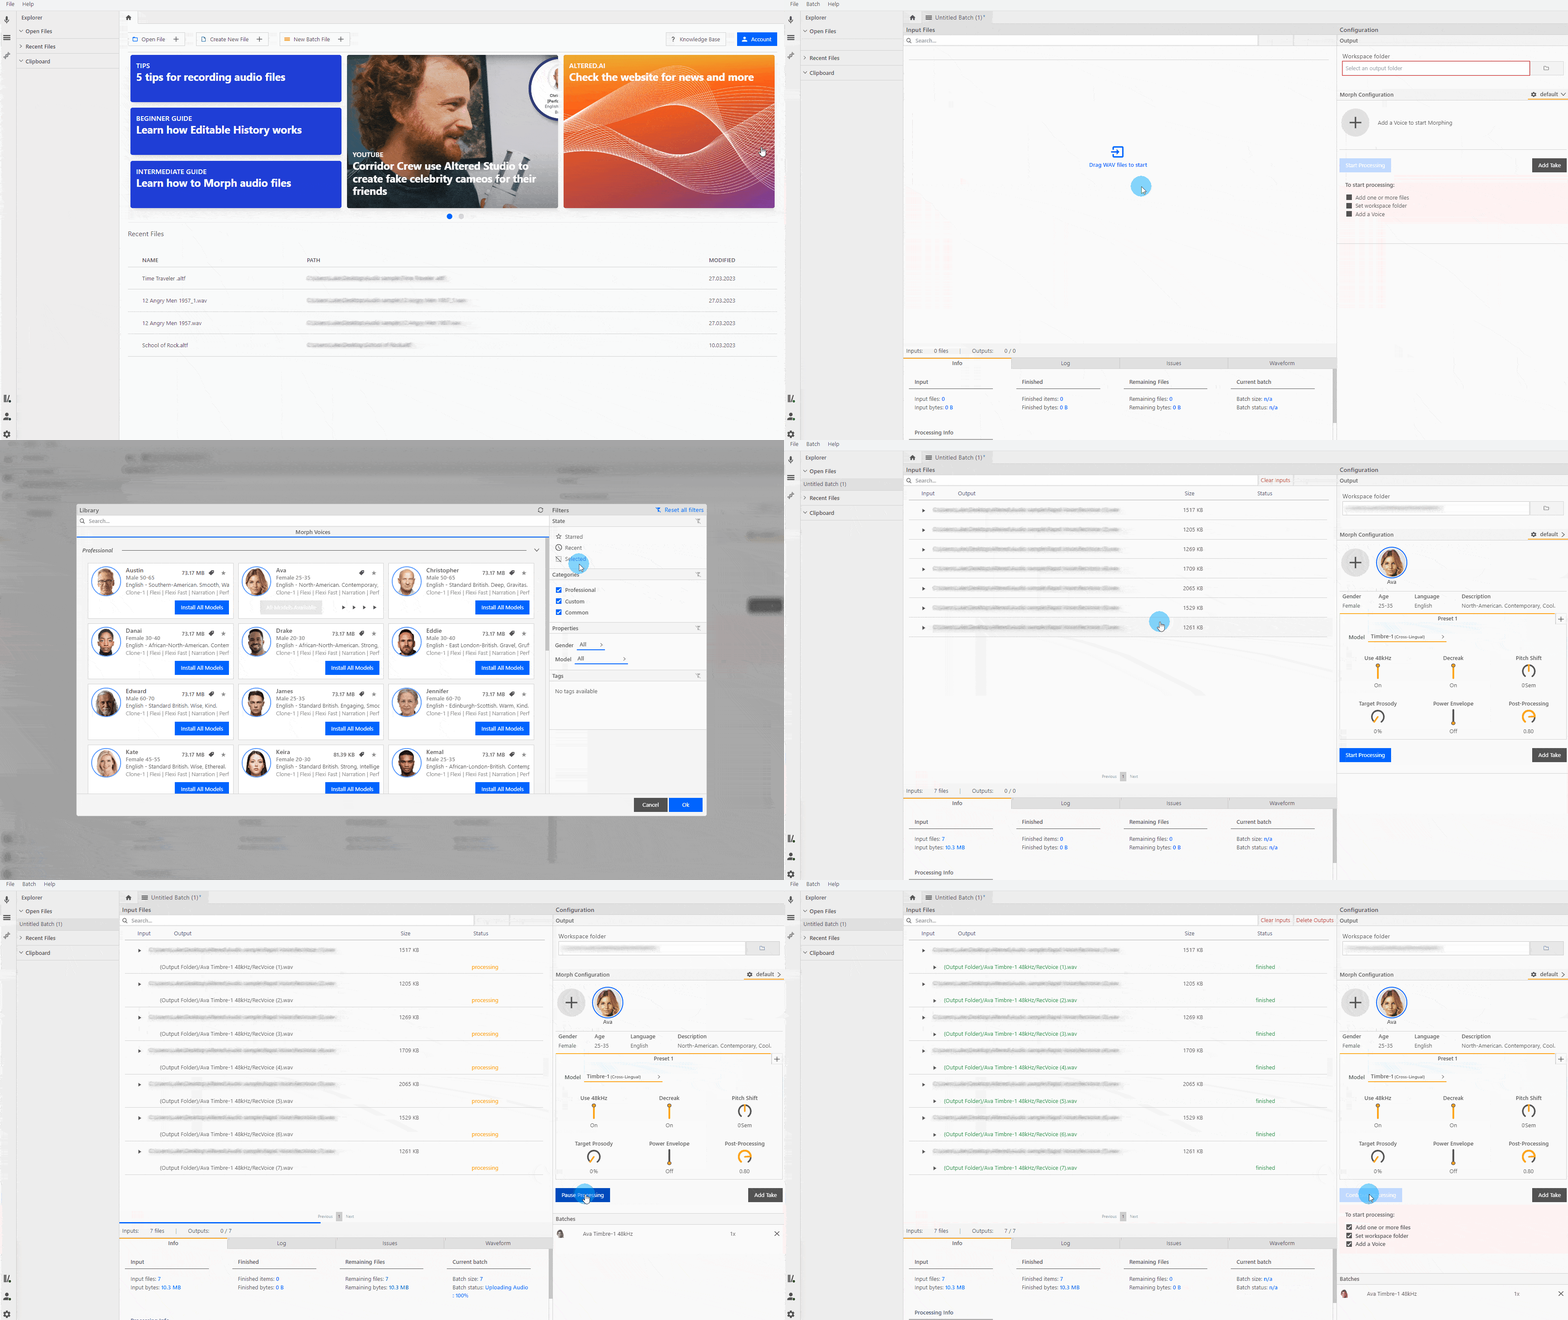
Simplified Morphing batch mode is used to apply Speech–to-Speech to audio files.
Audio files (wav format only) can be added to Batch Mode by dragging them from the desktop onto the Batch Mode screen. These can be either individual files or folders containing multiple files.
Add your chosen voice(s) and adjust your voice settings, or alternatively you can load a preset selection of voices you have saved previously. Click Add Take for each voice to add them to the batch queue.
Only one take is required, however as noted above the STS synthesis is non-deterministic so you may wish to generate multiple takes and then ‘audition’ these to choose your preferred take to use.
You can remove a Take from the queue by clicking the ✖️ on the right of the list of Takes (under the Start Processing button).
When you are ready, click Start Processing to begin the batch process.

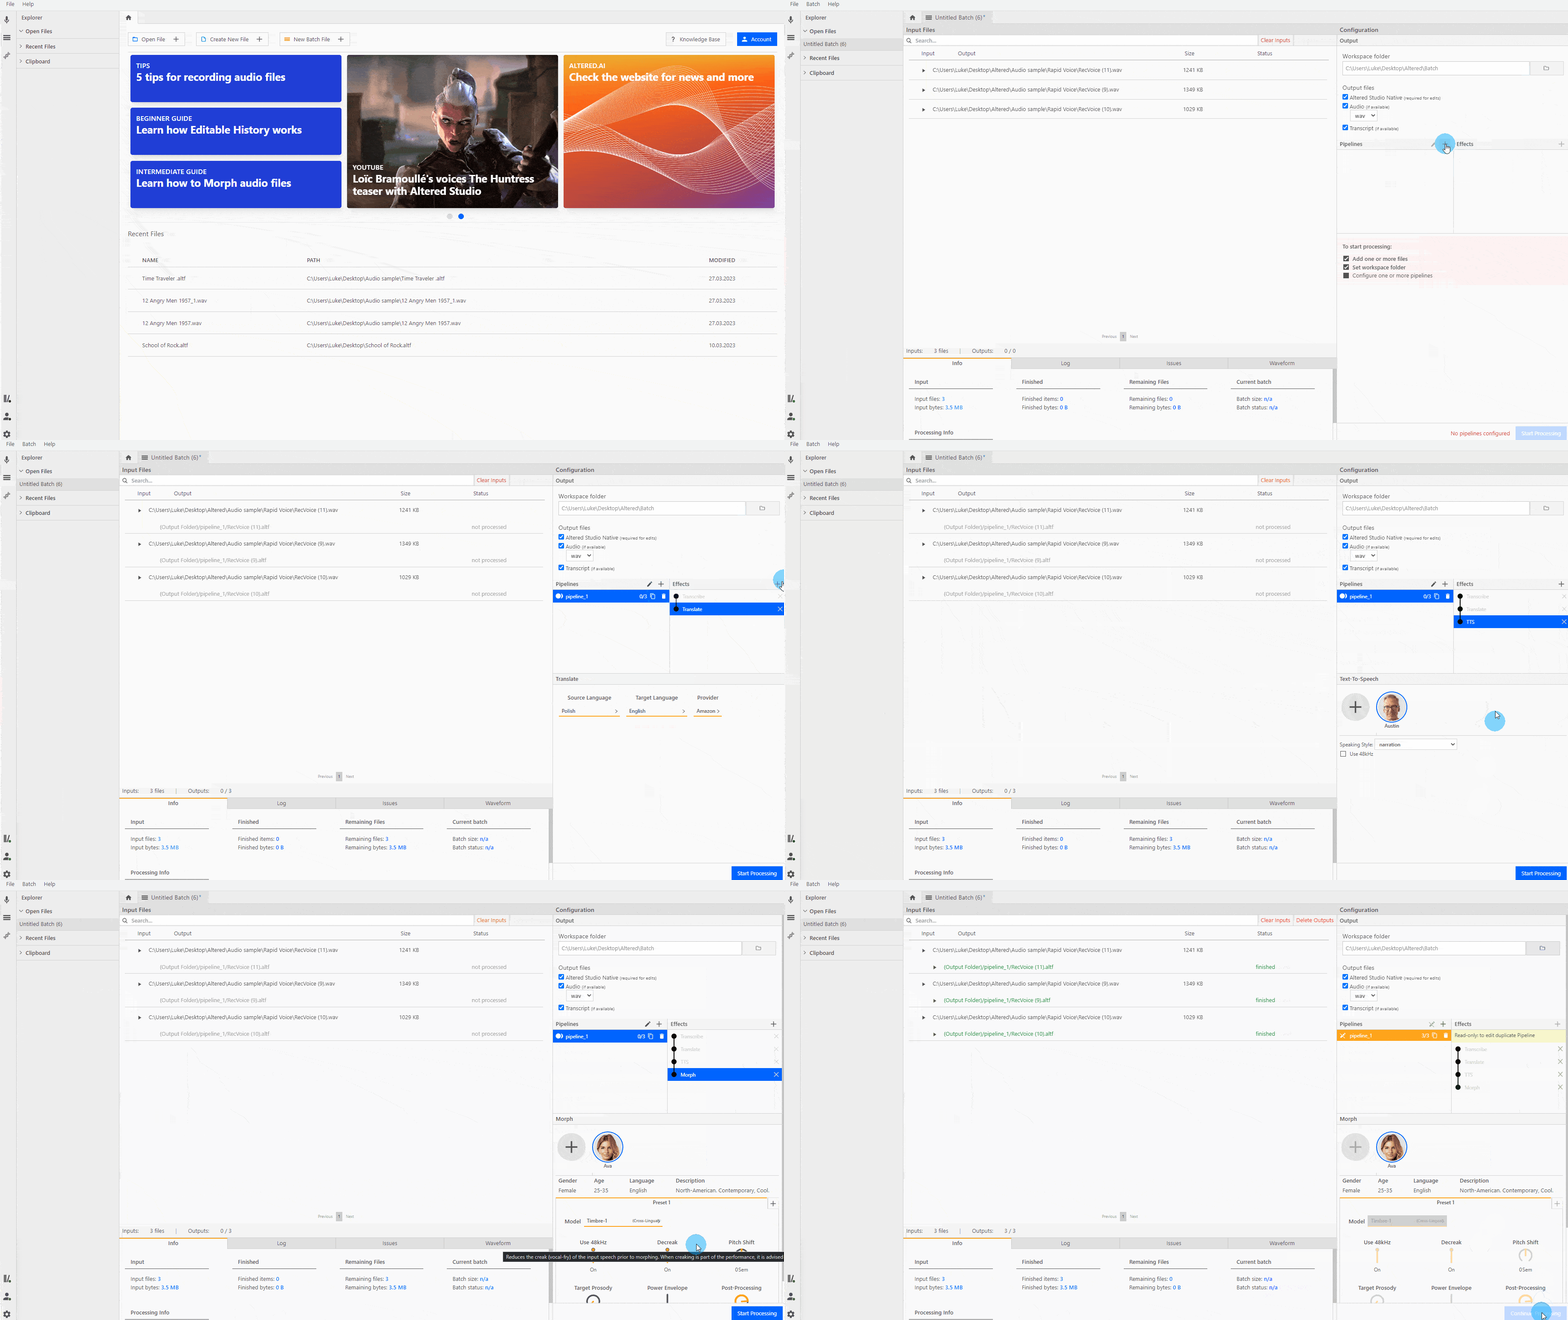
Audio Input batch mode allows you to create ‘pipelines’ of effects, including morphing, that are applied to the audio files you select as inputs.
For example if you wished to create a foreign language dub of an audio file, you may build a pipeline of:
Speech to Text to transcribe the audio file
Translate to your chosen language
Text-to-Speech to speak the text in the new language
Speech-to-Speech with a Timbre model to change the TTS voice to one of our Professional STS voices.
Set your workspace folder for file outputs. Beneath this you can also choose if you want to export a .altf file for each output, what file type you require for audio output, and if you want a copy of the transcript. Note batch mode only accepts wav files as input, regardless of the output file type)
Use the ➕ button to add a pipeline to the list. You can rename, duplicate or delete a pipeline by clicking the icons on the relevant pipeline in the list.
Each pipeline has a list of effects which are to be applied in sequential order. Use the ➕ button on the Effects panel to add a new effect. You must have at least one effect per pipeline, but there is no limit on the number of effects you can add to a pipeline.
When adding Morph or TTS effects to a pipeline you can only have one voice per effect. If you want to generate the same pipeline with multiple voices, first create your pipeline, then click the Copy icon on the pipeline to duplicate it. You can then amend the second pipeline to have your preferred alternate voice, and repeat this process for each different voice you wish to apply.
When you are ready, click Start Processing to begin the batch process.
Once the batch has been processed, the pipelines are locked and can’t be changed. If you want to make adjustments to a pipeline, duplicate it, make the changes and click Continue Processing.

Text Input batch mode also allows you to create ‘pipelines’ of effects, including TTS and morphing; however this uses text (CSV) files as inputs, instead of audio.
Select your workspace folder and file options as described in the Audio Input section above.
You can enter the text manually using the Add Text Item button, or you can import a CSV with multiple lines of text. The format for the CSV should be File Name in column 1 and Text in column 2. Your CSV file should have headers filename and text on these two columns.
Create your pipelines and effects as described in the Audio Input section above and click Start Processing to begin the batch process.