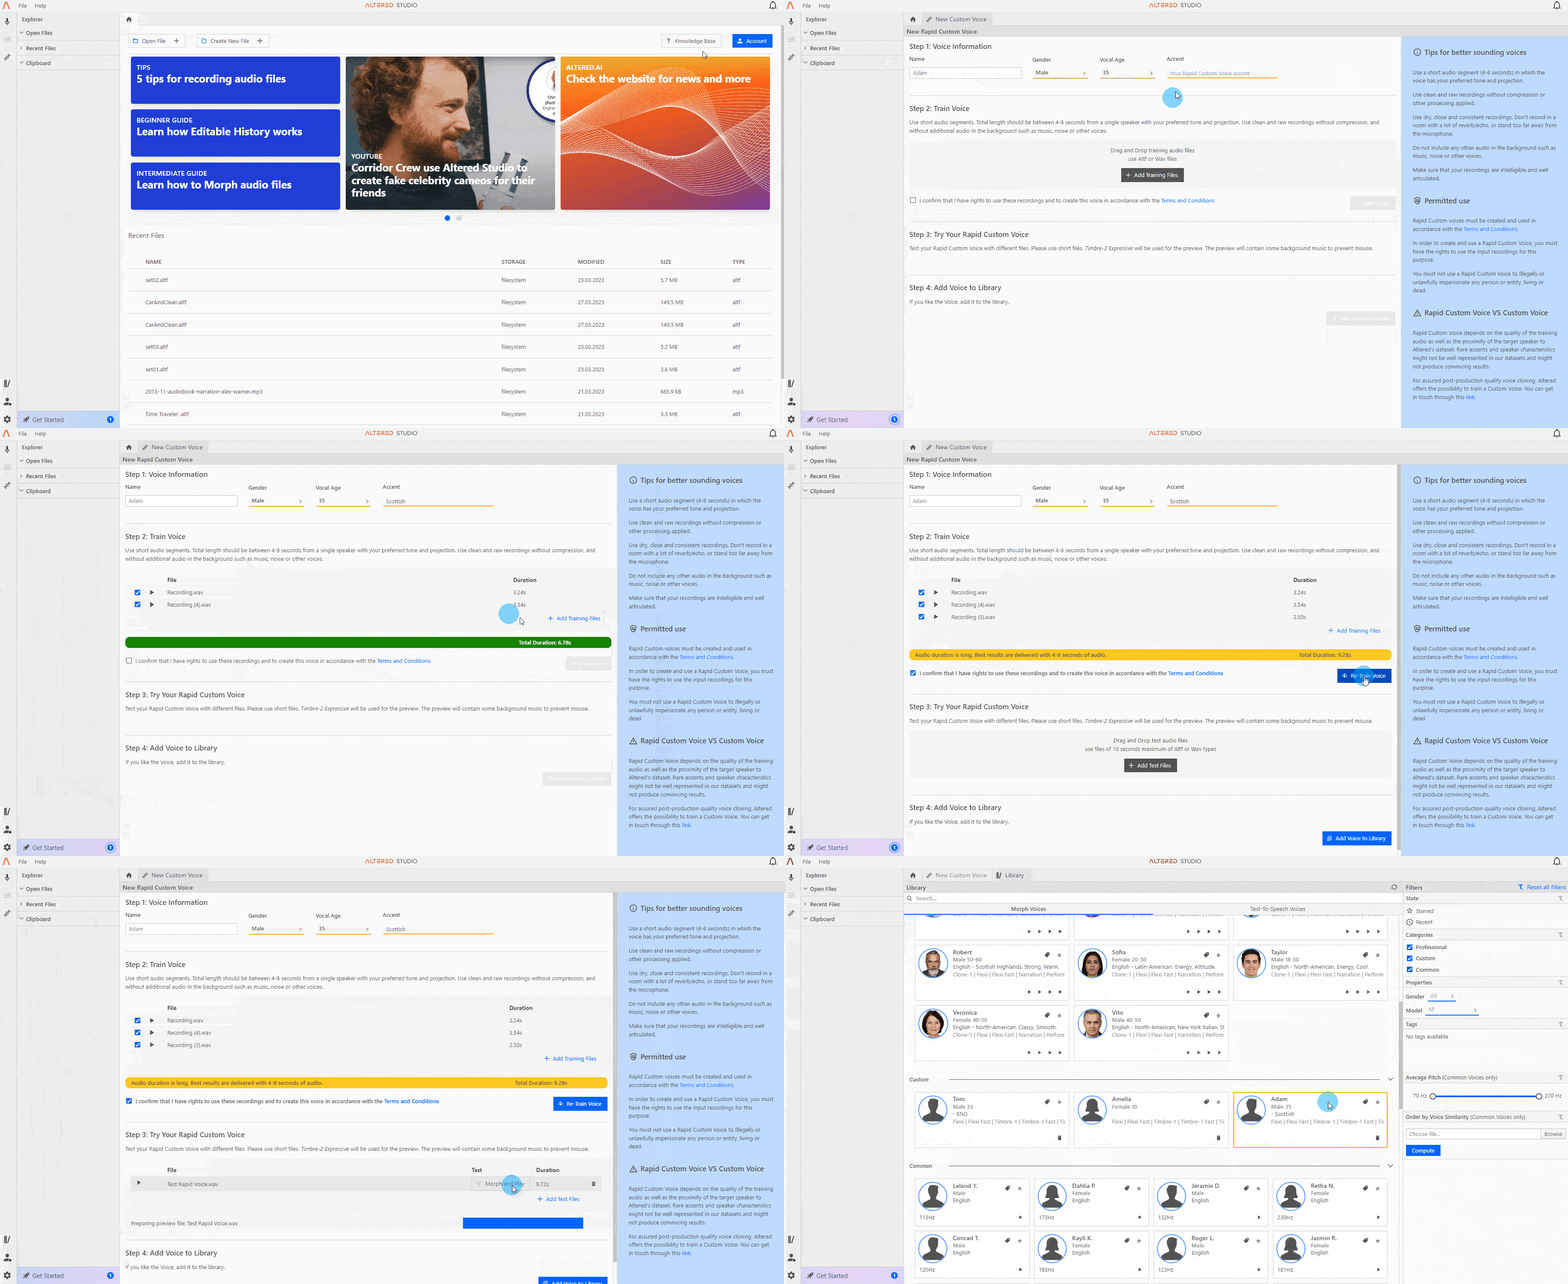
Rapid cloning allows you to create a “vocal footprint” of your voice. This is not a full, nuanced model like our custom voice creation service however, as Rapid cloning is designed for short form voicing, pick ups, etc. to capture the “likeness” of the voice.
You must have the permission of the voice owner to create the voice and the rights to use the recordings (for example they are not subject to Copyright or other IP restrictions). Do not create any voices for which you do not hold these rights.
To use the voice cloning feature, click the 🧬 icon on the left hand menu bar, underneath the Batch mode icon.
You will need 4-8 seconds of audio to use to create the custom voice. It is best practice to choose clips that have the same speaking style as your desired voice. You cannot use more than 20 seconds of audio, so please have short files ready to upload.
Step 1: Give your model a name, and assign Gender, Vocal Age and Accent if you wish. This is to make filtering and searching in the voice library easier, however these labels have no effect on the modelling of the voice.
Step 2: Upload short sample audio files of the voice you want to train. These should be clean, raw audio, without any effects or filters applied. The speaker should be close to the microphone and background noise or room reverb should be avoided as these can interfere with the synthesis quality. You can use one or more sample files for training, as long as the total length does not exceed 20 seconds.
Once you have selected your training files, confirm that you hold the relevant rights to proceed, and click Train Voice.
Step 3: Try your voice by uploading audio files you want to morph. Each file needs to be less than 10 seconds long as they are intended for testing only. Click Morph and Play to generate the preview file. The preview file contains soft music and static to prevent misuse of the voice clones.
If you are not happy with your morph, try different input files and choose “Re-Train Voice”
Step 4: When you are happy with your Click Add to Voice Library to save the custom voice for future morphs.
Once created, your custom voice will appear in your Altered Studio Library under the Custom Voice section, and can be used for Speech-to-Speech morphing.
Note that Step 4 is only available to paying customers. If you are on a free trial, you will be able to listen to the morph with different input files at Step 3, however you will not be able to save the voice to your library.