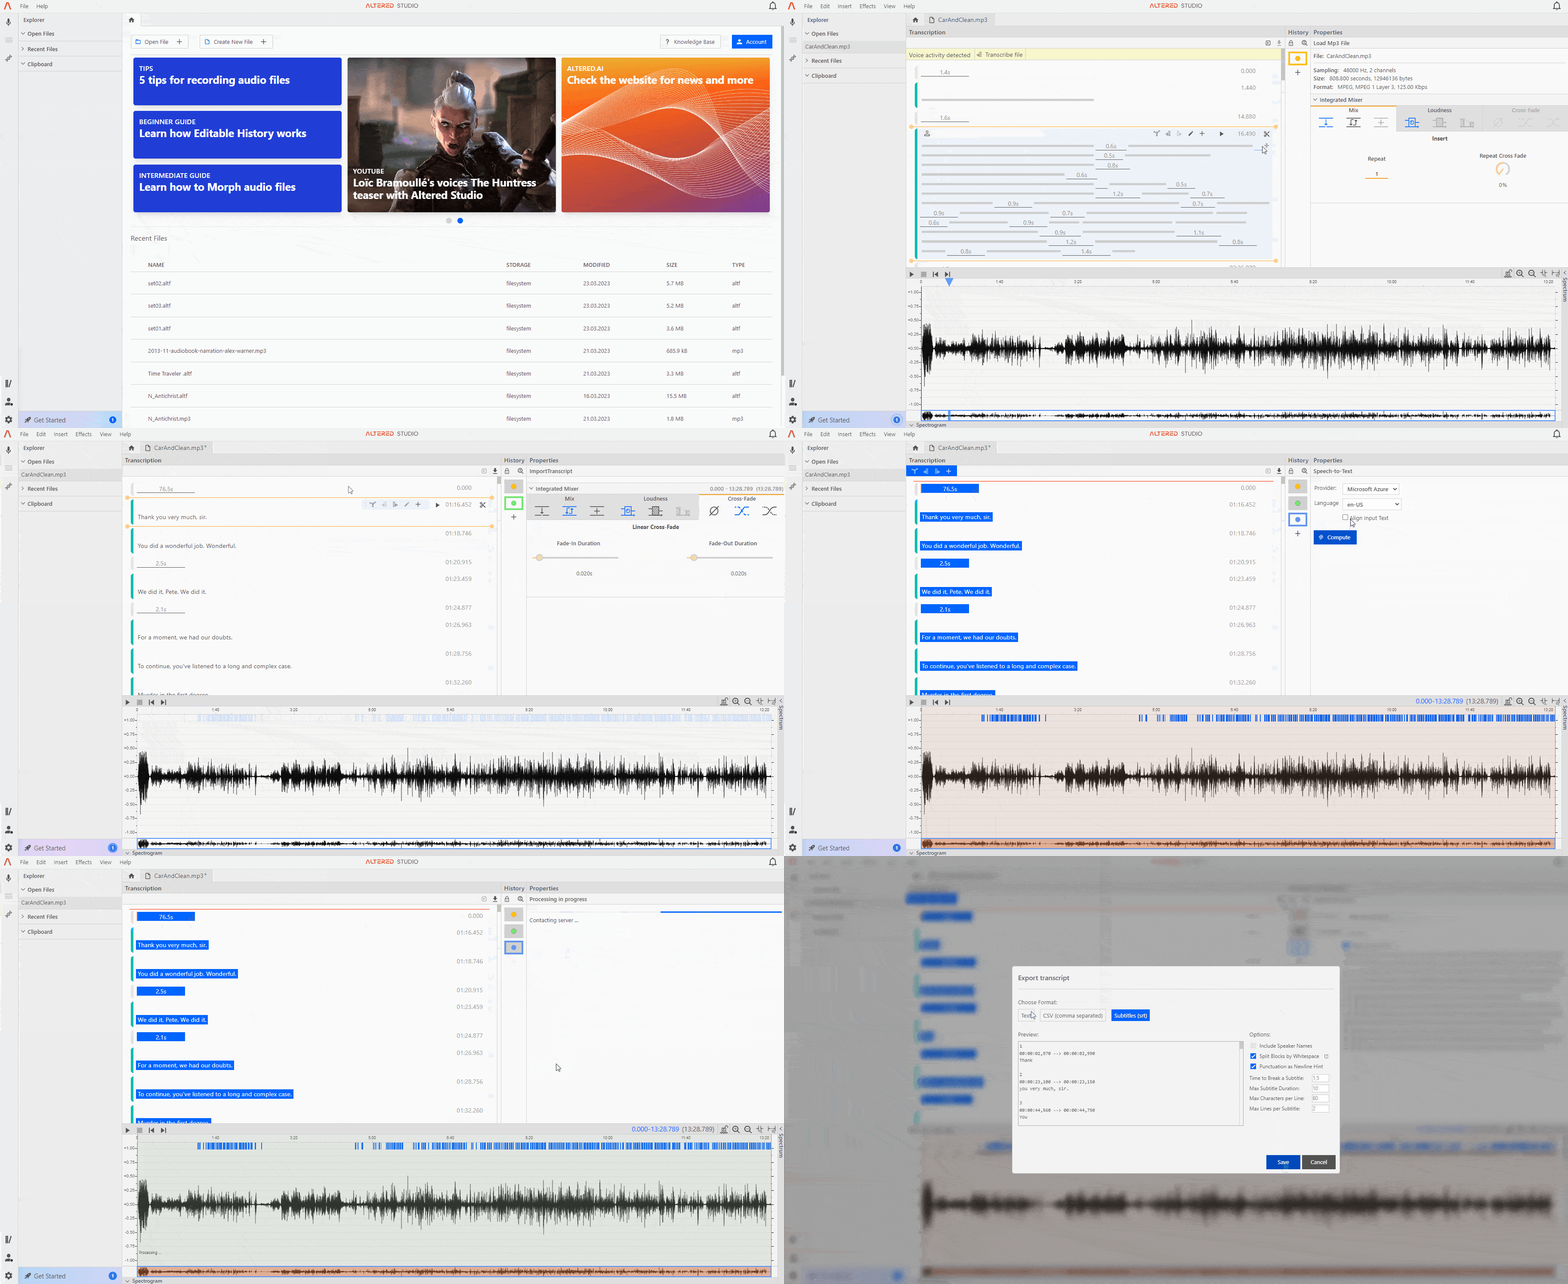
1. If you want to use Altered Studio to generate subtitles there are two options available.
2. If you already have the script for your audio, import this file into Altered studio in TXT or SRT format using the ➡] icon in the top right corner of the Transcription panel. This will import the text into Altered Studio as a single block.
3. Next add a Speech-to-Text effect to the whole file, using either the + button on the History panel or use the Effects menu. Check the box for Align Input Text and click Compute. This will perform a transcription of your file and will compare and align your imported text to the audio. Altered Studio will retain your imported script as the audio text in the Transcription panel. Where there are variations between the imported and transcribed text, these will be shown above the waveform for reference. Note the Align to Text is not shown when using the quick “Transcribe File” option, you should insert a Speech-to-Text effect to access this option.
4. If you don't have the script for your audio, you can transcribe the file using the Speech-to-Text effect and make any edits or corrections required.
5. Once your script or transcription is correctly aligned to your audio, you can edit speaker names manually or they will be added if you perform synthesis. You have the option to include the speaker names in the exported SRT file if this is relevant to you.
6. You can export the Transcription Panel as an SRT, TXT or CSV file by using the ⬇ icon in the top right corner of the Transcription panel. During the export you can adjust several export settings including characters per line, number of lines etc.